Beast of Reincarnation: How to Defeat Nushi Taurus and Unlock Camellia in the Crater Fortress
Navigate the blight-infested Rotting Roots, solve the Crater Fortress environmental puzzles, and locate the Camellia item to survive the brutal Nushi Taurus boss fight.
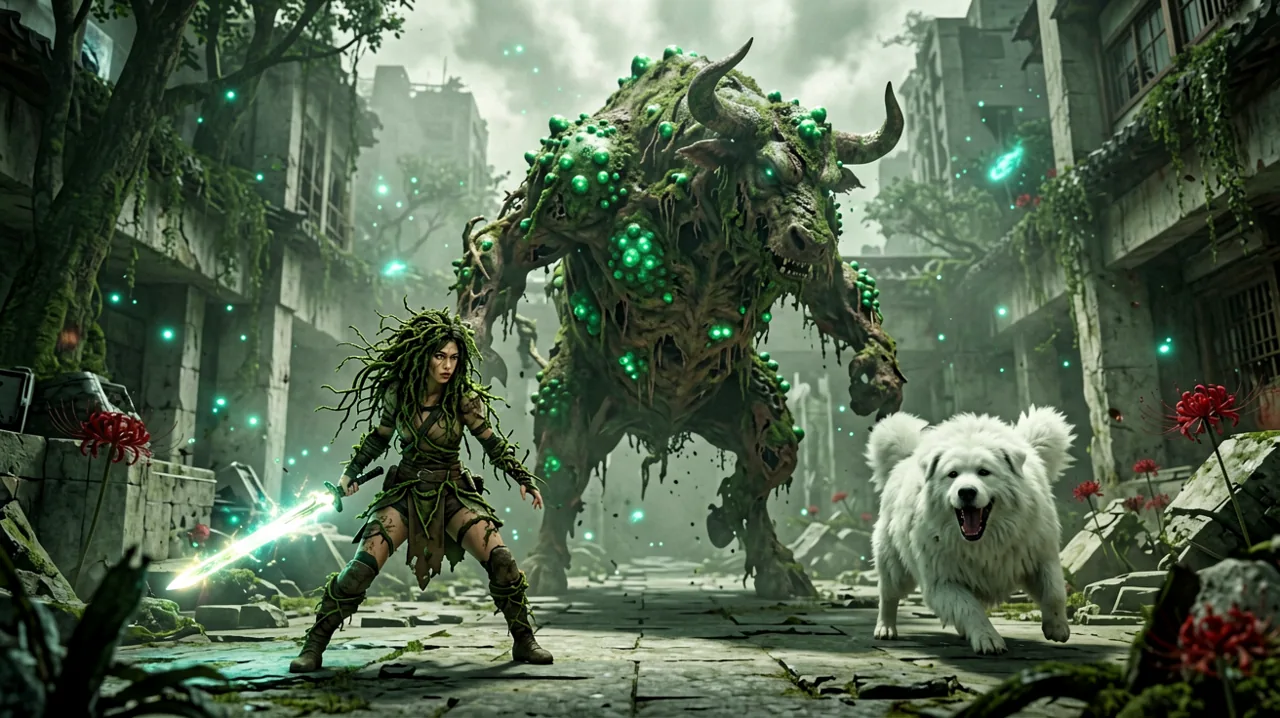
Two weeks post-launch, Game Freak’s ambitious departure from family-friendly monster catching has proven to be an absolute gauntlet. Beast of Reincarnation is unapologetically difficult, demanding precision, patience, and a thorough understanding of its mechanics. This steep learning curve is vividly reflected in the community’s reaction—the game currently sits at a highly debated 2.8 average rating on platforms like Backloggd, as tourists drawn in by the stunning Unreal Engine 5 visuals bounce off the punishing combat rhythm.
However, for those willing to endure the trial and error, the rewards are immense. The mid-to-late game area known as the Crater Fortress stands out as one of the most mechanically demanding segments of the entire 40-hour campaign. This rusted, brutalist monument of year-4026 Japan is heavily corrupted by the parasitic blight, presenting aggressive environmental hazards and culminating in a brutal boss fight against the colossal Nushi Taurus.
If you are struggling to make progress in this unforgiving zone, or if you are playing on the explicitly punishing Hard Difficulty (a favorite among seasoned action RPG veterans), this breakdown will walk you through navigating the Rotting Roots, solving the environmental puzzles to locate the highly sought-after Camellia equipment, and systematically dismantling the Nushi Taurus.
Navigating the Rotting Roots and the “Creeping Tendrils” Hazard
Before you can even lay eyes on the towering architecture of the Crater Fortress, you must descend through the Rotting Roots. The community is still debating whether this cavernous, subterranean network is a naturally formed geological structure or the petrified, decaying corpse of an ancient malefact. Regardless of its origin, the area introduces a severe environmental modifier: the “Creeping Tendrils.”
The floor of the Rotting Roots is blanketed in a dense, pulsating layer of blight spores. Walking directly on these surfaces will rapidly fill Emma’s toxicity meter. If the meter maxes out, you will suffer a massive chunk of immediate damage, followed by a continuous health drain that drastically reduces your margin for error in subsequent combat encounters.
To survive here, you must rely heavily on Emma’s Sealer abilities and her unique traversal mechanics. Look for overhead structural beams, fossilized roots, and hanging lanterns that emit a faint, pale light. You can use Emma’s plant-like hair to grapple and swing between these anchor points. Momentum is key. Releasing the grapple at the apex of your swing grants extra distance, allowing you to bypass massive stretches of toxic terrain.
This is also where Koo’s scouting utility becomes absolutely vital. While Emma is forced to remain airborne or perched on narrow columns, Koo can safely traverse the blighted ground for short periods. By issuing the scout command, Koo will run ahead, barking to reveal the silhouettes of hidden enemies submerged in the spores. Use this tactical advantage to drop down for devastating plunging attacks, neutralizing threats before they can ambush you.
Locating and Unlocking the Camellia Item
As you approach the heavy iron gates leading into the inner courtyard of the Crater Fortress, you might feel compelled to rush straight toward the massive boss arena. Stop. Take the time to explore the western wing of the ruins. Recent community discoveries have highlighted a powerful tool known as Camellia, and unlocking it requires completing a specific sequence of steps before you confront the Nushi Taurus.
Camellia acts as a significant upgrade to your defensive capabilities, highly prized by players utilizing aggressive builds and Spirit Stones. Whether you view it as a crutch or an essential piece of your loadout, the utility it provides during tight parry windows cannot be overstated.
Here are the precise steps to unlock Camellia:
- Find the Collapsed Aqueduct: From the final Generator Device (checkpoint) outside the Crater Fortress gates, turn left and grapple across a series of broken pillars until you reach a dry aqueduct.
- Clear the Spore Wall: The path is blocked by a thick, writhing wall of blight. Standard melee attacks will bounce off. You must command Koo to agitate the surrounding flora, exposing the central nerve of the wall. Once exposed, use Emma’s Sealer absorption technique to drain the blight, causing the vines to wither and crumble.
- The Pressure Plate Puzzle: Inside the hidden chamber, you will find a shrine submerged under a cascading waterfall of toxic sludge. Standard traversal is impossible. On the upper ledge to your right, there is a heavy pressure plate. Command Koo to stay and hold his position directly on top of the plate.
- Retrieve Camellia: With Koo holding the plate, the toxic waterfall will temporarily divert into side drainage grates. You now have a narrow 15-second window to drop down, interact with the shrine to claim Camellia, and grapple back up before the sludge resets.
Equipping Camellia fundamentally alters Emma’s defensive posture. Unlike the offensive-focused Blade Arts, Camellia actively extends your active parry frames by a fraction of a second and provides a minor stamina regeneration buff upon a successful deflection. Given the erratic, delayed attack animations of the upcoming boss, this slight margin of error is a literal lifesaver.
Boss Fight Primer: Defeating Nushi Taurus
The Nushi Taurus is a massive, heavily mutated bovine malefact that serves as the undisputed guardian of the Crater Fortress. Unlike earlier, more agile bosses, the Taurus is a relentless, heavy-hitting brawler that will punish poor stamina management and greedy attack strings with immediate death, especially if you are playing on elevated difficulty modes.
Phase 1: Horn Sweeps and Ground Stomps
When you drop into the arena, the Nushi Taurus will waste no time closing the distance. Its primary attacks are sweeping horn slashes that cover a massive horizontal arc and devastating ground stomps that create localized shockwaves.
Dodging backward is a trap. The boss’s forward momentum ensures it will clip you at the end of your invincibility frames. Instead, you must stand your ground and parry. This is where Camellia proves its worth. Focus entirely on the beast’s shoulders. The moment its shoulder dips, tap the parry button. Successfully deflecting the horn sweep will build up its posture damage rapidly.
If the Nushi Taurus rears up on its hind legs for a delayed stomp, do not attempt to parry. The timing is intentionally deceptive. Instead, utilize Koo’s slow-motion tactical skills to issue a distraction command. Koo will bark and dart around the boss’s legs, interrupting the stomp animation and leaving the creature vulnerable to a fully charged heavy attack.
Phase 2: Blight Eruption and Charge Attacks
At roughly 50% health, the Nushi Taurus will roar, violently rupturing the glowing green blight spores along its spine. The arena will become significantly more dangerous as toxic pools begin forming randomly on the ground, severely limiting your movement space.
The boss’s moveset completely changes in this phase. It will prioritize a brutal charging attack, lowering its head and rushing you with incredible speed. This attack flashes with a distinct red aura, signaling that it cannot be parried.
To counter this, you must interact with the environment. The Crater Fortress arena is littered with thick, structural stone pillars. When the Taurus lowers its head to charge, immediately position yourself so that a pillar is directly between you and the boss. Wait until the absolute last second, then use Emma’s vine-hair to grapple vertically out of the way.
The Nushi Taurus will crash headfirst into the stone pillar, stunning itself and taking a massive chunk of posture damage. Drop down immediately and unleash your strongest Blade Arts.
The Final Sealing
Once you break the boss’s posture entirely, the creature will collapse, heavily panting. This is not the end. You must quickly approach the beast’s head and trigger the contextual Sealer prompt.
What follows is a gorgeously animated, viscerally satisfying sequence where Emma utilizes her parasitic hair to violently rip the concentrated blight from the creature’s core, absorbing the sickness into herself and cleansing the arena. Failure to execute the sealing prompt in time will allow the boss to regenerate 15% of its health and resume the fight, so remain hyper-vigilant as the posture bar nears its breaking point.
Embracing the Friction
The frustration surrounding Beast of Reincarnation is palpable across social media, with many players venting about the lack of pre-release marketing setting proper expectations for just how hardcore this game actually is. Comparisons to heavy, deliberate titles like Mortal Shell are incredibly apt. Game Freak has not compromised on their vision of a hostile, decaying future.
Encounters like the Nushi Taurus are designed to break your bad habits. You cannot button-mash your way to victory, and you cannot ignore the symbiotic relationship between Emma and Koo. By exploring meticulously to find tools like Camellia and mastering the deliberate rhythm of parries and tactical commands, you will eventually conquer the Crater Fortress—and understand exactly why this unapologetic design is resonating so deeply with genre purists.